
THE KAYAK KORNER: Don't Fear DIY
- iBass360
- May 23, 2020
- 5 min read

Updated: May 26, 2020

Kayak fishing is a lot of fun and it can be quite simple. You can buy an inexpensive Kayak, a paddle and a life jacket at an outdoor or sporting goods super store and take them straight to the water, along with a rod & reel and a handful of lures, and start fishing. It's this simplicity, a harking back to the bank fishing we did as kids, that appeals to a lot of different anglers. I started kayak fishing when I was 16, and I did just that. I had saved up $100, and I bought the cheapest kayak I could find. It wasn't fancy- no rod holder, no electronics, no fancy storage, but I managed to catch a lot of fish from it, using it until I was well into my 20’s. However, as soon as I moved into tournament fishing, I knew I had to make major upgrades. Let me share with you my recommended upgrade plan.
Step 1: Give Me Power!
Whether you are talking a simple fish/depth finder or an elaborate graph/mapping system with side imaging, a trolling or propulsion motor, a YoloTek camera mount or navigation lights, a power source, is the most basic- and necessary upgrade. Finding the right battery to fit into your

kayak without adding too much weight is your first challenge. I bought two small batteries specially designed to be used in a kayak- Bass Pro Shop had just what I needed. Although I opted for a simple purchased solution, there are many variations and a lot of choice from the simple to the complex. For example, at one end of the spectrum, you can rig your trail camera battery for use in your kayak. At the other end would be the integration of sophisticated lithium batteries. The keys are knowing what you are capable of installing, what budget you have to work with, and the requirements of the type of fishing you prefer. Once you understand these variables, don’t be afraid to do the research- lots of YouTube videos to watch- and do shop around.
Step 2: Where’re The Fish?
Fishing a lot of different water- especially in a tournament series where each round presents a different lake, with different structure, and limited practice time- is tough enough with

sophisticated graphics. It is near impossible to be successful without it. A good fish finder will give you a third eye, a view into what's actually going on down there. My first fish finder was a Deeper sonar bobber. I ran it on a string from my Old Town Vapor, using an old cell phone hooked up to the power pack. This gave me about 6 hours of sonar life on a very small screen. You have to start somewhere. This rig led me to my personal best bass, one that is still a lake record, and a third place finish in the OKA Dog Days tournament. Without that sonar, I would never have found the deep cover where she was waiting for a meal.
When I upgraded my kayak, a Sun Dolphin Boss 12 bought used, it came pre-rigged with a Humminbird Piranhamax 4 Fishfinder. It had a 4.3-inch color display that helped pinpoint potential catches. It could penetrate up to 600' of water. You could mount the transducer either

inside the hull or on the transom and its mount allowed it to be tilted and swiveled. I have to say, it was a pretty good unit for a recreational angler. It did not have GPS or maps. As I got more serious about tournaments, I upgraded to a Humminbird 859 DI which accommodated a Navionics chart card which allowed me to study a lot of different lakes before I even put the boat in the water. It had good topographic detail of the bottom, and was easy to install as it used the same plugs as my smaller fish finder.
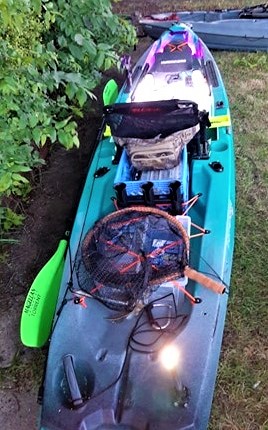
Recently, I upgraded my kayak again- to an Old Town Topwater 120. Fortunately the transducer was easy to mount to the pre-rigged plate located directly under the hull. Here is where I made my biggest electronic upgrade. I wired in a 4-switch panel that would accommodate not only the graphics but also lighting.

Step 3: Let There Be Light!
Tournaments are big on safety. When you are in a kayak, and big bass boats occupy the same
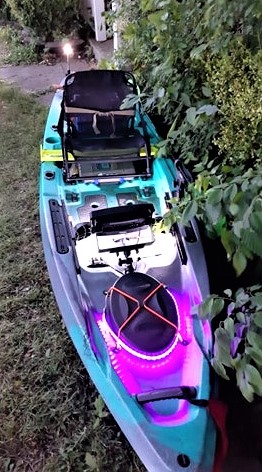
water, you are thankful someone is looking out for you. The most common requirement is the need to have 360 degree safety lights for the early morning hours. A lot of us also like night fishing. A good headlamp is very important for this, but adding deck lights is a really sweet addition, as is a special UV light which can actually attract baitfish and, the predators that seek them. Your first inclination, and it was mine, might be to use a battery powered lantern for the 360 light. It’s cheap, functional, and met the requirement. However, once you have the upgrade bug, I envisioned wiring the lights onto my kayak.
I am not going to sugar coat it, wiring lights requires a little more skill, the right tools, and maybe even some help from your wise grandpa- or a friend who has some practical DIY experience. With the right tools, and a little help, I was able to set up the lights in a little over 4 hours. When you take on more sophisticated electrical projects for your kayak, unless you have bought a time of the line, pre-rigged model, you can be pretty sure you will need to drill some holes, and fish or


thread the wires through the hull. This was definitely the case for me with 360 light. I had to drill some small holes for the deck lights too, and cut a very precise hole in the front part of the boat to mount the switch plate. Fortunately, the model of kayak I had bought made it very easy to work on. If you are not going to buy a kayak already tricked-out, make sure to do the research as to how easy the particular model you are considering is to upgrade yourself.


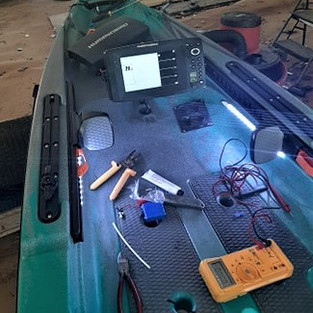
As you do your work, keep the conditions in the front of your mind. There are times it will be rough, and a lot of the time things will be wet. To accommodate this, all my connections were
first soldered, then coated with dielectric grease before I double shrink wrapped them to prevent shorts from condensation or water in the hull. I also highly recommend using marine
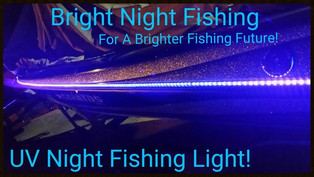
grade connectors. I connected each switch to an inline fuse. I was able to purchase these components for around $100 at Academy Sports + Outdoors. The deck lights were about $15 a piece. For the UV light, I used Bright Night Fishing’s LED Black Light Night Fishing LED Strip Ultraviolet 12v fishing light boat dock fluorescent which was about $30 with shipping cost. I recommend clamping the rope lights with good marine adhesive for at least 24 hours before taking it out for a test run. The rest outline the steps taken to install the lighting. The bottom line from my experience, don’t let DIY intimidate your desire to own the night. #LiveThePassion!


The angler behind Kayak Korner, Zachery Warren, from Denison TX, is a carpenter. He works to build houses while teaching young people who have faced challenges not

only learn a trade but also learn to fish. Zach has become a well known competitor on the Texas and Oklahoma Kayak Bass Tournament scene and has become increasingly competitive. He holds the Largemouth Bass record on Oklahoma's Durant Lake- an 11.3 lb. monster. He is pro staff for The Reel MVPs baits and is a frequent contributor of Kayak Fishing articles to the iBass360 blog and the iBass360 digital magazine.


Comments